This quick tutorial will run you through all the technical basics of setting up a Vtuber model from scratch and getting it onto a streaming platform like Twitch. This tutorial is specifically for setting up a 3D vtuber model, so we’ll be avoiding any talk of Live2D, Cubism, and rigging. This gets prohibitively expensive for beginners and hobbyists who are hoping to commission their way out of dealing with it. Once I myself am confident in those tools I may revisit this tutorial and do a Part 2, because I know how much everybody loves those flat mother fuckers.
Below are the steps I followed as well as the tools I personally use while streaming and recording on Youtube.
This should run on your PC or Laptop fine, but note that it may get quite intensive if you’re streaming a game at the same time, so some hardware limitations may apply. If you have a decent gaming rig you have nothing to worry about.
1. Get a webcam
Straight from the top starting with a lie, I said you could do this all for free, unfortunately the one thing you are going to need is a webcam. This will be used to capture your beautiful expressions. There’s a lot of options here though, and even if you don’t have a dedicated camera you can jury rig your smartphone or iphone to do the job (in fact if your iphone supports Face ID then it might even be better than a webcam!). Setting those up is outside the bounds of this tutorial though so once you figure that out come crawling back here for the rest of the tutorial. Otherwise if you can plug in a Webcam and your PC recognises it you can continue on in confidence!
I’m not sure what the minimum viable webcam you can use would be, but personally I use a Logitech hd webcam c270 that records at 720p and 30fps that I just happened to have knocking around the house when I decided to give Vtubing a go. It’s quite low end and will set you back around $50. I’ve heard good things about the Nexico N60 which goes for a couple bucks less and has even better specs than the C270, but I can’t speak from experience on that.
The webcam comes with a microphone, but for audio I use my headphone microphone as it’s closer to my face. It does passable audio for my purposes. The pair of headphones I personally use are the HyperX Cloud Stinger‘s and will set you back about $55 as well.
2. Download Vroid Studio
You can download Vroid here. It’s also available on Steam. Vroid is the free tool we’ll be using to create our avatar. It’s quite streamlined, and as long as you aren’t doing anything super fancy you can have an NPC looking avatar up and running in no time at all.
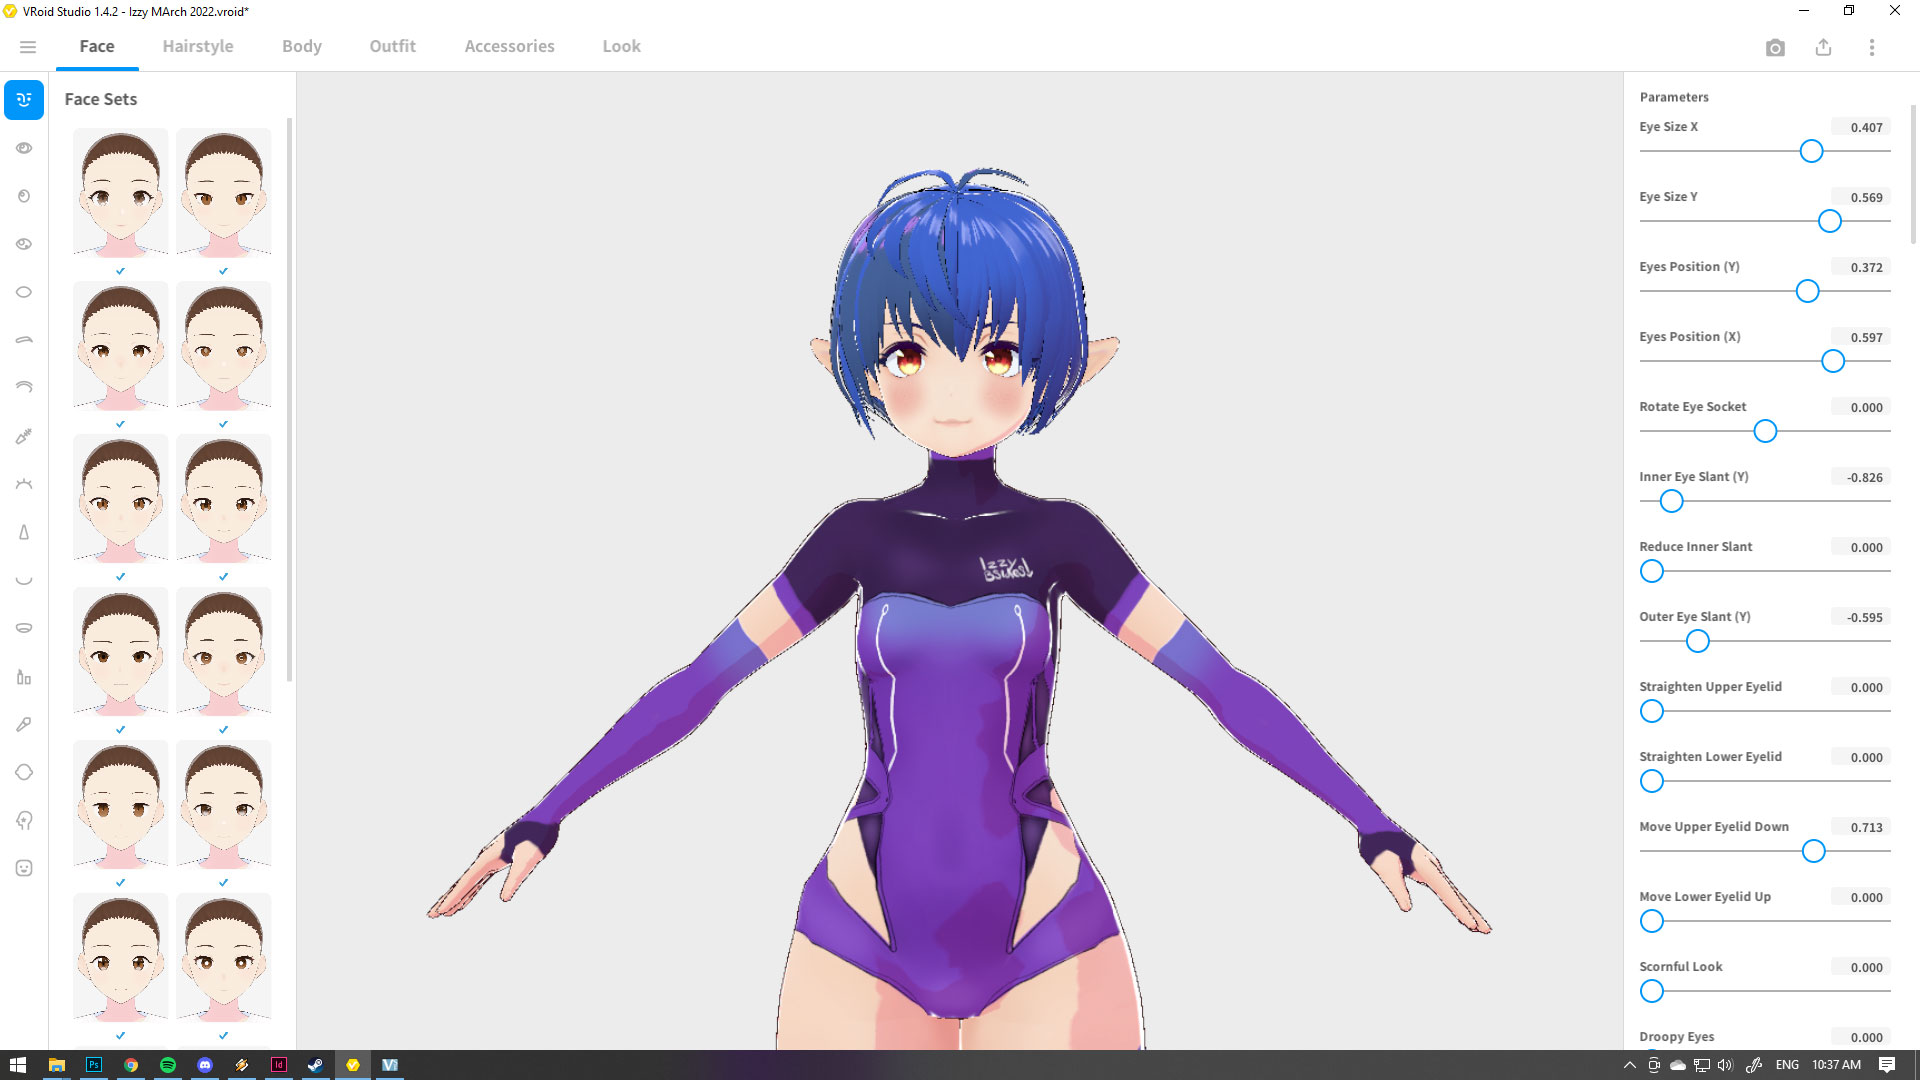
I’ll let you explore the menus and tweak to your hearts delight. Once you’re done in the top right hand side of the screen you should see that little tray icon with the arrow coming out of it, click on it to get your export settings. What you want to do is export as VRM.
I don’t believe you should need to tweak any of the options you should see once clicking this, so go ahead and export to somewhere where you can find it. Be sure to also save your vroid model and keeping copies of your save somewhere, this is different from your VRM file.
3. Download VSeeFace
VSeeFace is the tool we’ll be using to bring your vtube avatar to life. It’s totally free and totally available here. Of all the options I’ve tried it’s be far the best. There’s a range of settings and filters you can use on it, and you can also move the virtual camera around so you can capture your sona’s best angles.
Download and boot up VseeFace. You should then be greeted by a screen much like this one:
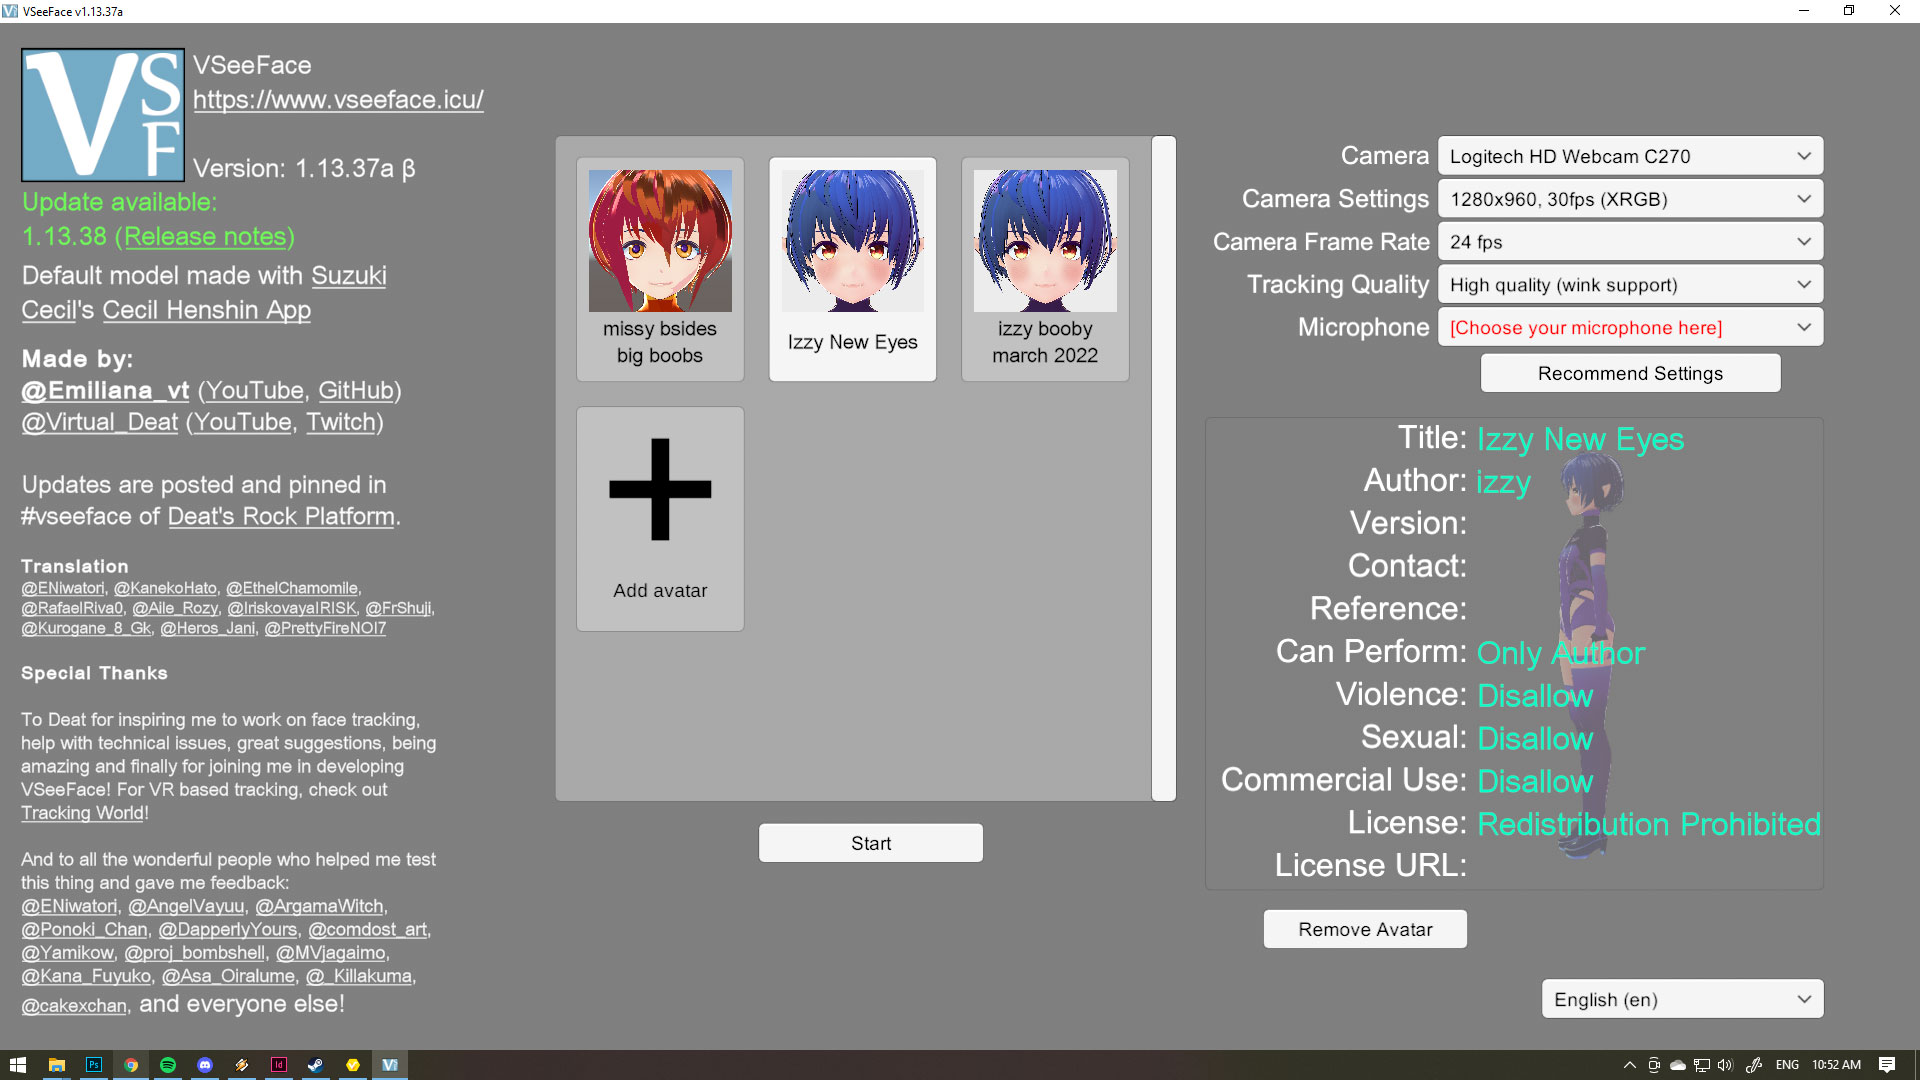
Click the big + to add an avatar. Don’t click start till you’ve chosen your camera source in the top right, and microphone if you want your avatars mouth flap around with sound. I’ve found that changing camera settings after leaving this screen is a bit of a bitch, generally requiring me to close the entire thing and reopen again. I may just not be finding the right menus later.
After a couple seconds your avatar should spring to life and start following your movements! I’d now take this time to click on the settings button on the top right of the screen and digging through each of the menus. I’m not gonna go into huge detail here as it’s all pretty self explanatory and you’ll be playing with these settings all the time to refine your avatars responses. One tip I will point out is in Settings then General Settings. Scroll down and find the Avatar Locomotion and Keep hips mostly fixed options. Having locomotion is handy if your doing full body shots with your avatar and you need them to do some walking when your head goes too far in one direction. Keeping hips mostly fixed is good if don’t really want your avatar going anywhere, mostly just leaning over etc.
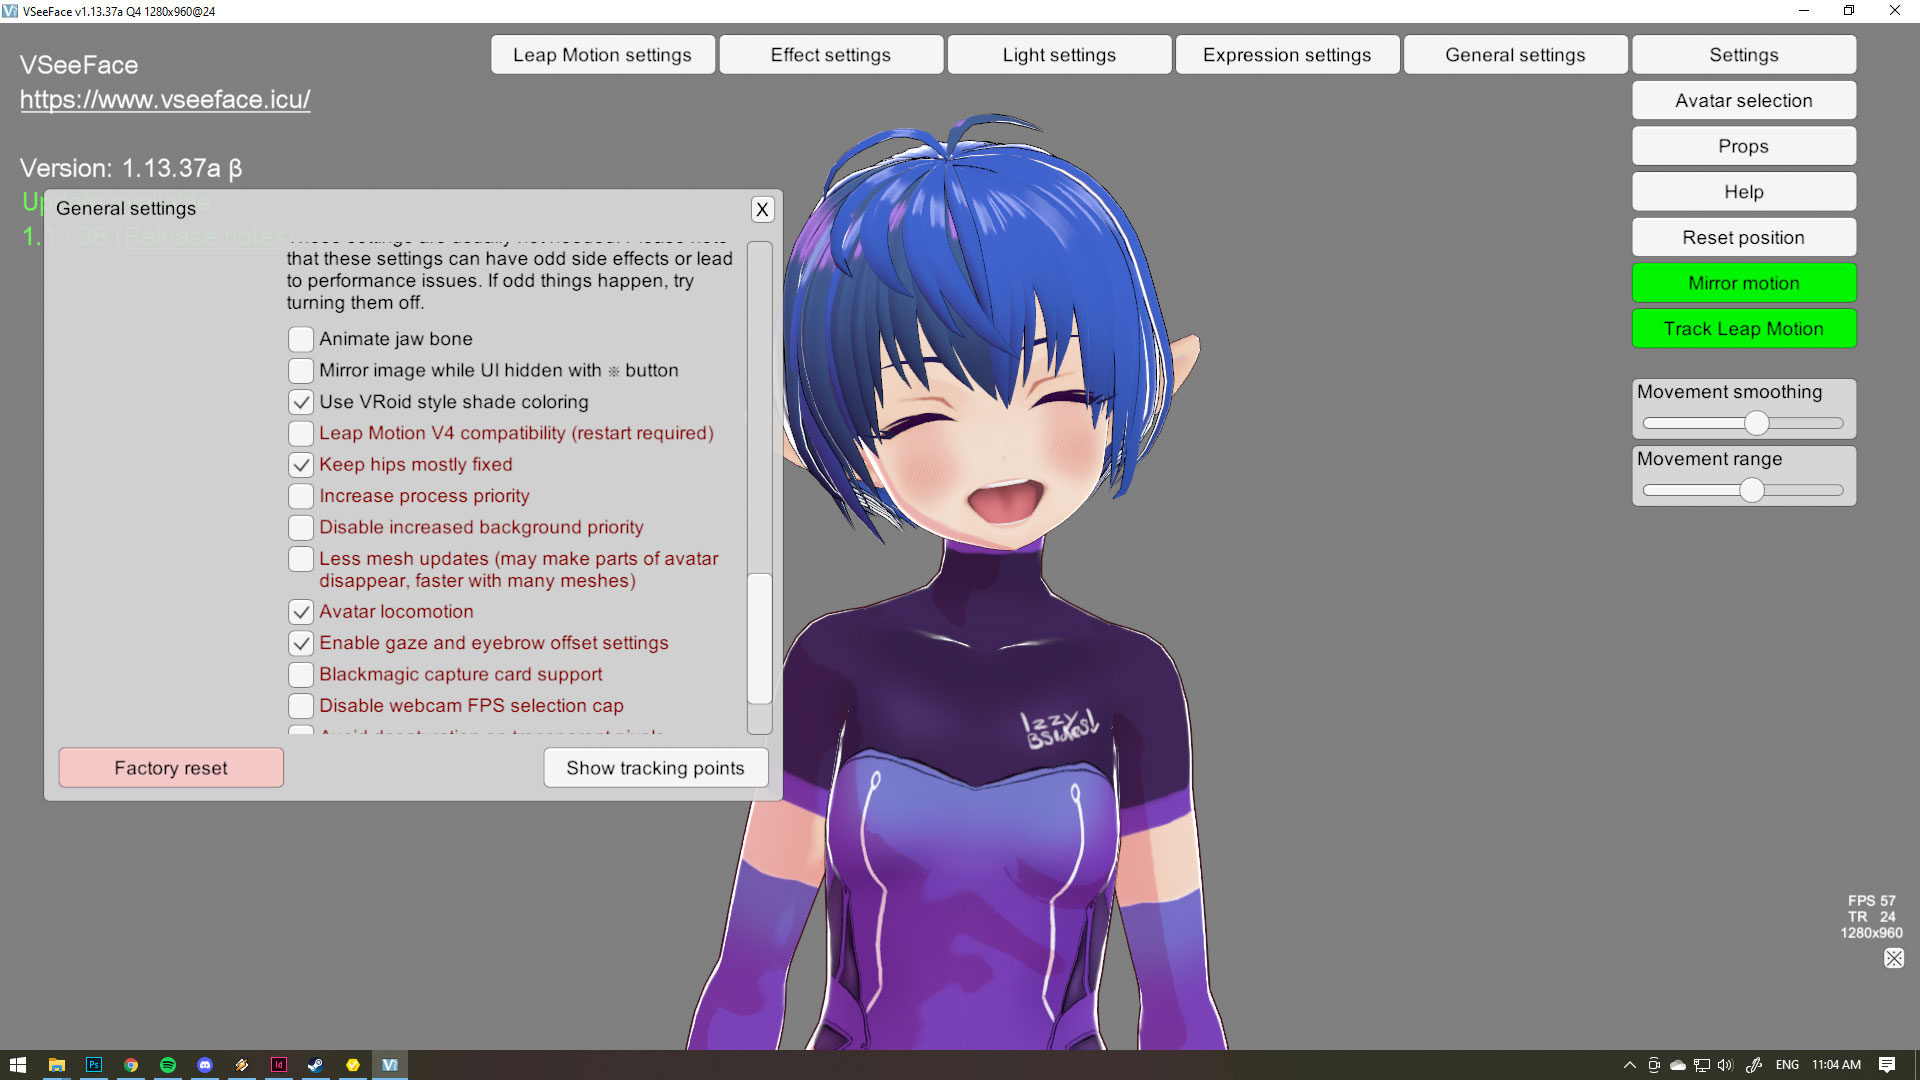
Other things I’ll quickly mention, holding alt and left clicking your avatar lets you pan around it. Holding alt and scrolling zooms in and out. Alt+middle click will move the character around in its entirety. Finally holding ctrl+left click will move the light source around.
Once you’re ready, the X button in the bottom right hand corner of the screen with those dots on it will make the VseeFace window transparent, and prime it ready for our next step.
4. Download OBS
You can download OBS here. OBS is a free open source piece of recording software, used universally by youtubers and streamers alike. We’ll be using this to screen capture your avatar in VSeeFace and then record/stream it to the world.
Once you have OBS downloaded and installed boot it up! Make sure VSeeFace is running beforehand as well.
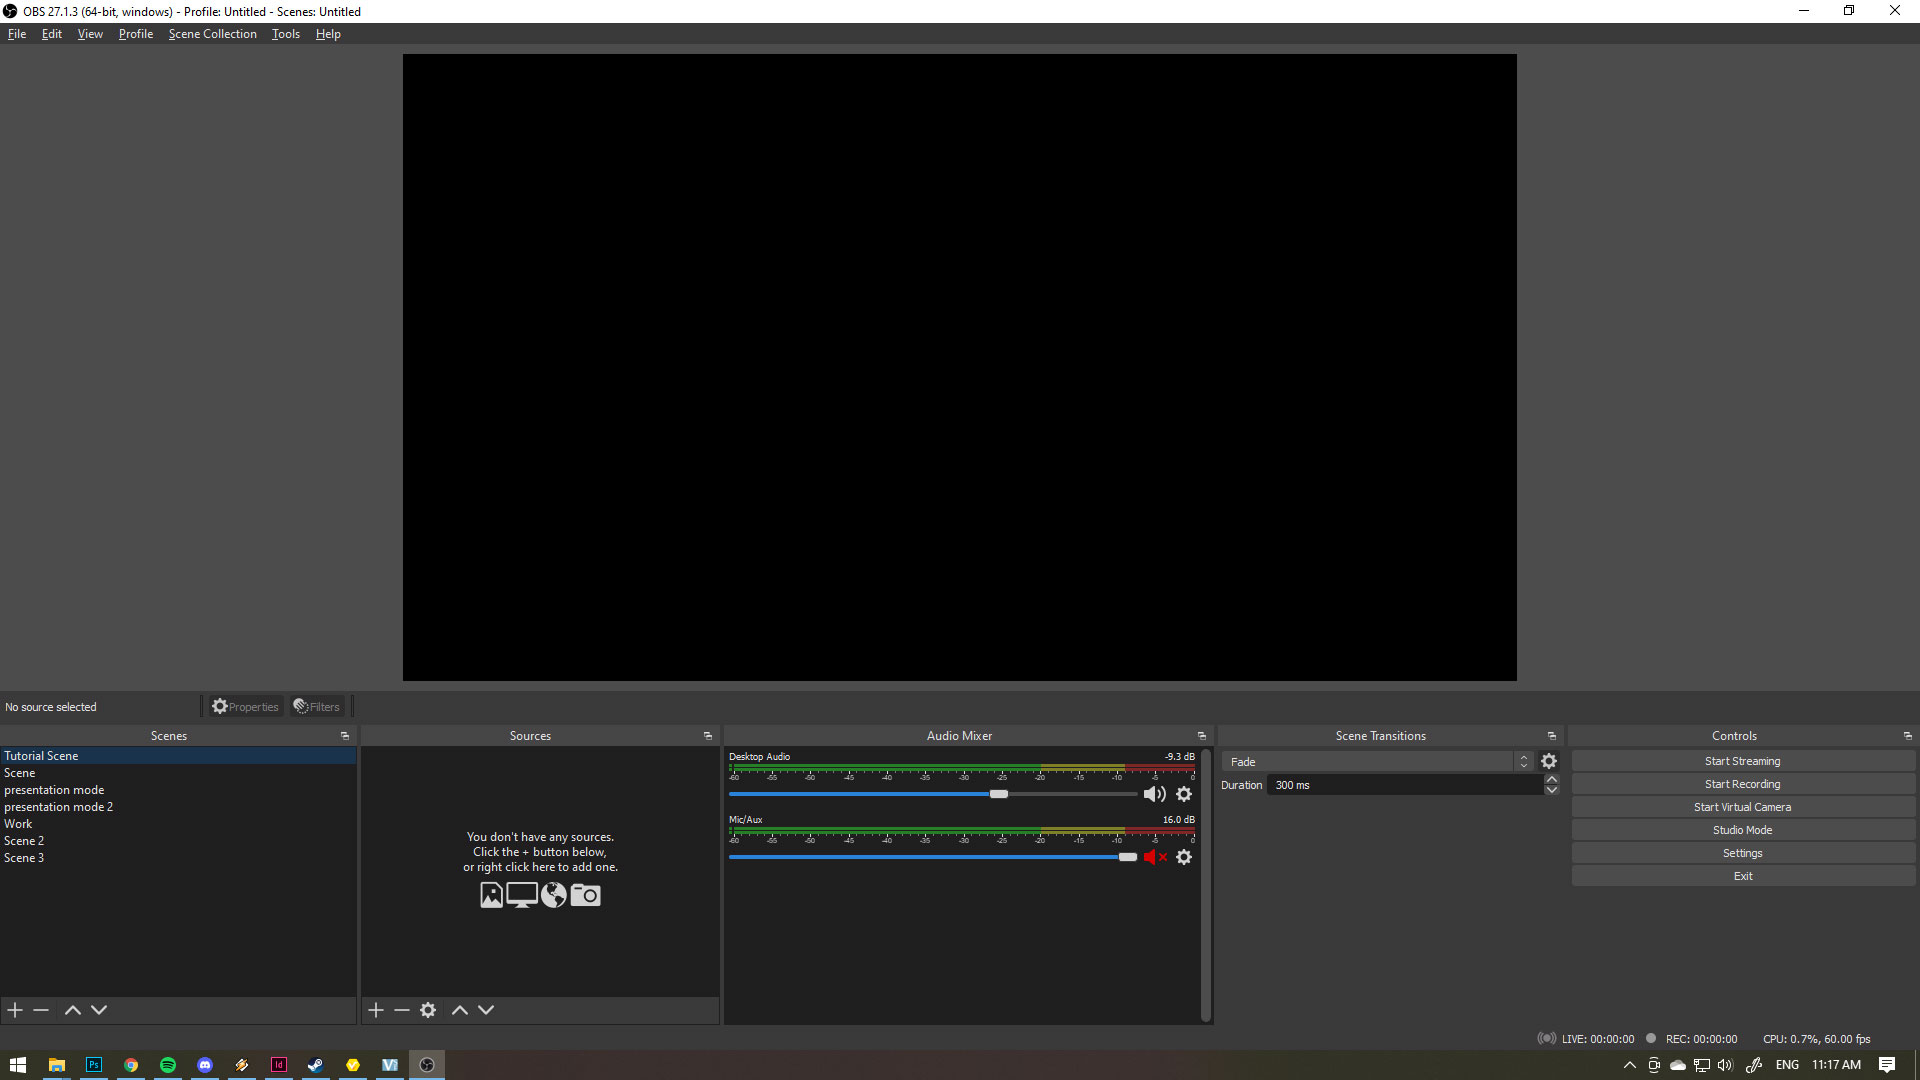
In the bottom left corner is a tray labeled “scenes”. Click the Plus button to make a new scene. Name it whatever you like. Consider scenes to be like a preset stage, It’s handy to have a bunch of these for different setups. Personally I have a couple for different streaming layouts as well as a few for different youtube views.
Moving on to the next trab/tray is “sources”. These will be all the different bits and pieces within your scene that people will see. Click the + button to add a new source. You’ll see a whole bunch of options here that you can add later to jazz up your stream, but for now add “Game Capture”. For the properties box that appears next (after deciding on it’s name) for Mode choose “Capture Specific Window”. In the dropdown below it called Window, choose the one you recognise as [VSeeFace.exe]. Finally tick the “allow transparency” box to remove the checkerboard background of VSeeface.
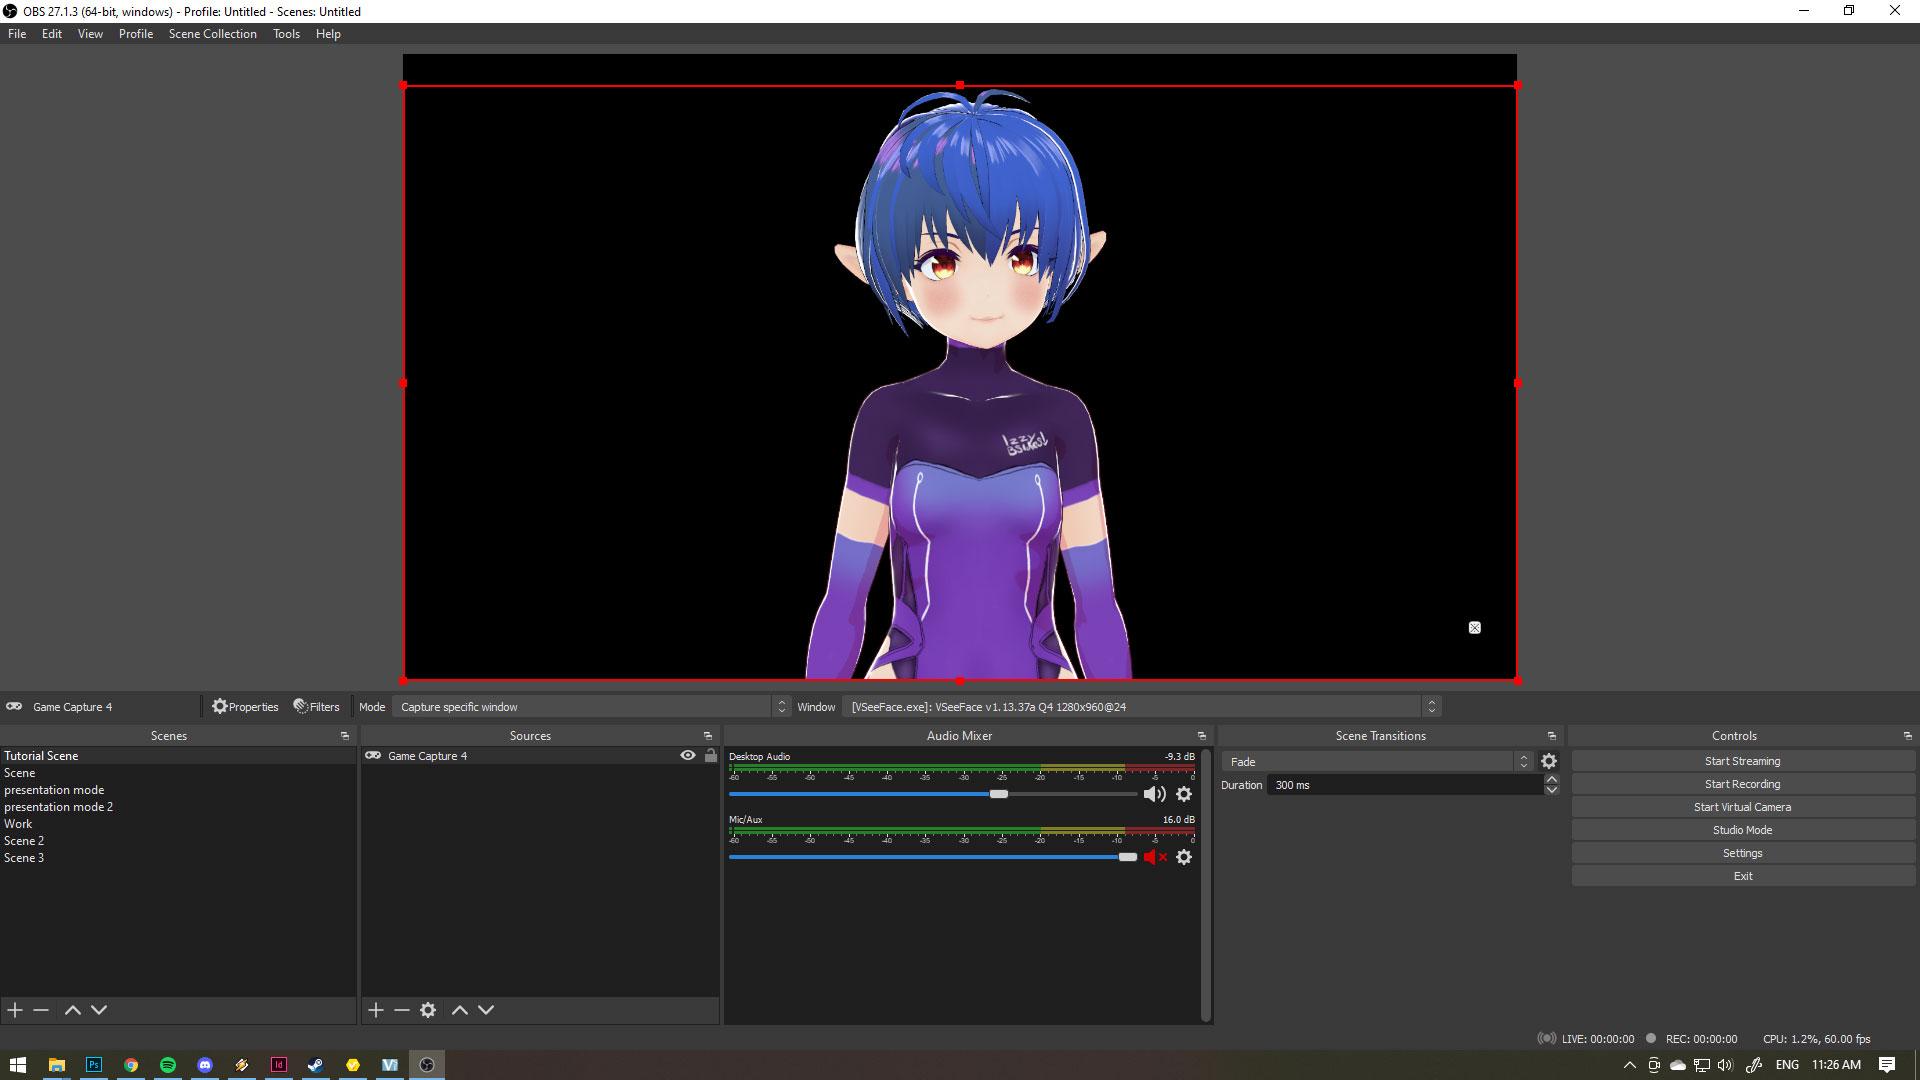
You should now see your avatar gloriously appearing in front of you. Watching every move you make. You can click and drag the window around on the stage to position your avatar correctly. You can also trim the edges of your source by click on it on the stage to get the red box to appear. clicking on the edges of the red box will resize it. Shift clicking and dragging will squish and stretch, and alt+click and drag will trim it, so you can hide that dumb button still appearing in the bottom right for example.
Back in the sources tray click the little lock so you don’t mess with it anymore and continue to add sources. You can stream an entire screen or individual apps. Sometimes games can react a bit weird if you’re just streaming your screen, so it’s something you’ll have to fiddle with prior to the Start Stream button on the far right. Don’t forget to add an audio source if you want people to be able to hear your voice. A good test is to go and do a test recording to get an idea of how people might be hearing you.
5. Get Your Stream Account set up
I don’t care where you’re streaming. It could be Twitch, Youtube, Picarto, whatever. The main thing is, get your account stuff all done. Once you’ve done that, find your Stream Key. This pile of letters and numbers is the code you’ll bring back to OBS so OBS knows where to send the data when you hit the “Start Streaming” button.
In OBS open Settings. Go to the Stream tab, pick the service you’re streaming to and input your Stream Key. Never share it, and never accidentally stream it either. If someone gets a hold of this they can essentially hijack your stream. There is a button on your twitch (or whatever) account that can reset your stream key if this ever accidentally happens.
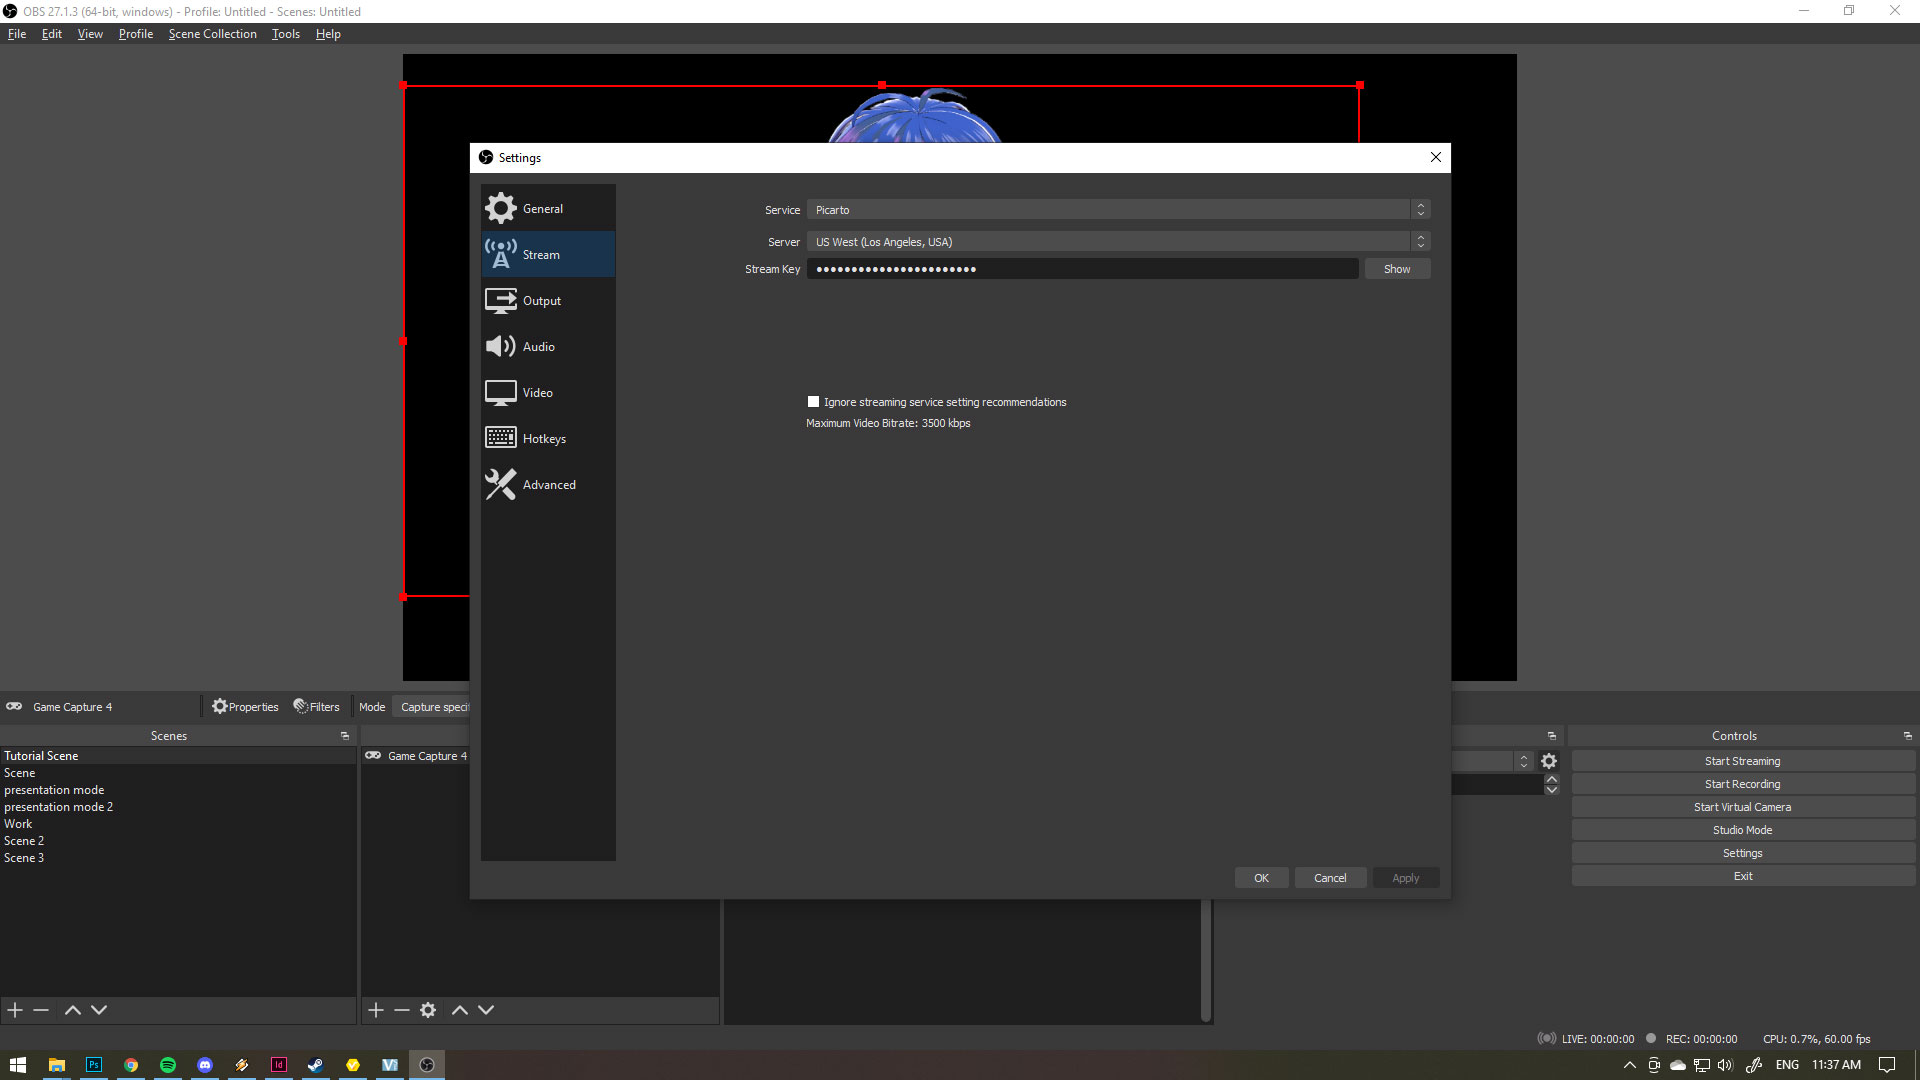
Once you’ve input this you SHOULD be good to go. Hit the Start Streaming button on the controls section of OBS (pictured bottom right on the picture above) to start wowing the world with your greatness.
In the bottom right corner of OBS you’ll get little lights, green orange and red, that tell you how healthy your streaming is going. If it’s going red that means you aren’t sending enough data to Twitch to have a lag free stream. If this is happening make sure you aren’t torrenting too much porn or your sister isn’t blasting 3 screens of Netflix.
6. You’re all done!
Congrats! You made it through the tutorial and you now have all the tools you need to be a vtuber. Within each of the steps I glossed over a lot of finer details for the sake of brevity. I trust that you’ll explore and experiment with each of these tools to get the performance you require. Streaming is honestly a bitch to get started at first, so many little things can go wrong, it does get easier with time, but you will find that you will be dipping into all of these programs often to tweak little things here and there, or unbreaking stuff.
If you found this tutorial helpful let me know! Link your new channel! and if you hit any speed bumps you think other people should know about, please leave a comment below, you could be saving the next person a ton of heartache and grief.
Post Tutorial Stuff For Pro Strats
Once you’ve come to grips with using all these tools together you’ll probably want to start getting a bit fancier with your model.
Now that you’re comfortable with using VSeeFace and importing your VRM model you can do all sorts of cool shit. One recommended tool is VRM Pose Transmitter, which will allow you to set a custom pose for your avatar to transmit into VSeeFace so you can continue to do face tracking. Hopefully one day this is something VSeeFace will natively be able to handle.
0 Thoughts on How To Get Started as A Vtuber For Free